
Enable Channels
|
Click icon to watch this demo on YouTube (Internet Connection Required) |
Channels may be disabled by typing the channel number preceded by a minus (“-”) sign. For example, typing “-3” disables channel 3 and removes it from the list of currently active channels.
|
Click icon to watch this demo on YouTube (Internet Connection Required) |
To enable or configure channels for acquisition, WinDaq must be in the SET-UP operating mode. Channels cannot be added, deleted, or configured once the user has entered the RECORD mode.
![]() Click
on the Enable button in the Toolbox.
Click
on the Enable button in the Toolbox.
![]() In
the Edit menu click on Channels...
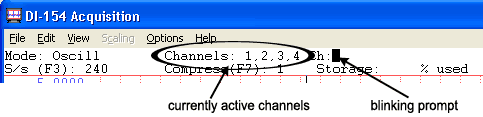
or double-click on the Channels:
field
in the status bar. This displays the Channel Selection grid.
In
the Edit menu click on Channels...
or double-click on the Channels:
field
in the status bar. This displays the Channel Selection grid.
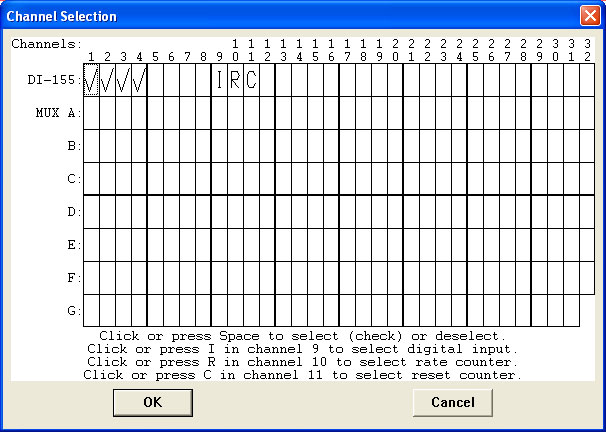

The current status of all channels is displayed in this grid. The Channel Selection grid allows the user to enable and disable analog and digital input channels. All channels are enabled/disabled with a left-click on the channel box. Analog Input channels show a checkmark when enabled. The Digital Input channels (channels 9 (general purpose digital input - "I"), 10 (Rate channel - "R"), and 11 (Count channel - "C")) show an I, R, or C, respectively when enabled.
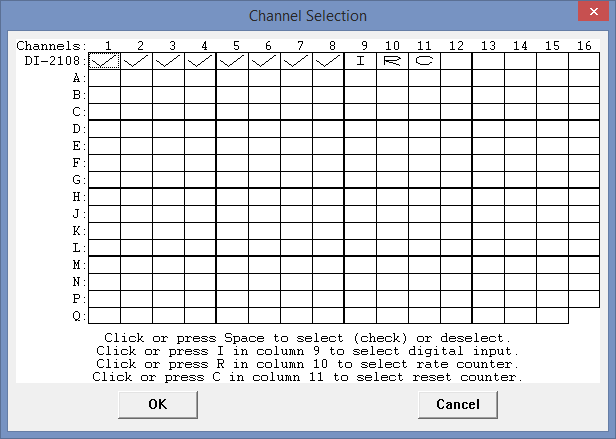
The channel selection grid displays all enabled channels with a checkmark. Enable/disable channels by clicking on the respecting channel box. Thermocouple channels will display the letter "T" in the channel box. Designate thermocouple channels in Channel Settings.
Note: Channels may not be added after the RECORD mode has been entered.