
Specifying a Sample Rate
|
Click icon to watch this demo on YouTube (Internet Connection Required) |
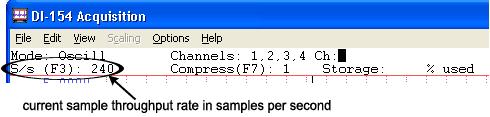
The total sample throughput rate is the rate that your instrument acquires samples for all channels combined. For example, to acquire two channels of data at 100Hz each would require a sample throughput rate (total scanning rate) of 200Hz (2 channels × 100Hz = 200Hz). The Sample Rate must be specified before recording; default varies.
WinDaq/Pro+ software has the ability to sample different channels at different rates. Because of this feature, the sample throughput rate (total scanning rate) is calculated differently. To calculate a total sample throughput rate for WinDaq/Pro+ software, multiply the number of channels to be recorded by the rate of the fastest channel. For example, suppose you want to record four channels of data, one at 2kHz and the other three at 20Hz. The sample throughput rate in this case would be 8kHz (4 channels × 2kHz = 8kHz).
Specifying a Sample Rate for DI-149 data acquisition starter kits
Specify a per channel sample rate:
The sample rate per channel is displayed in the lower left corner of the window as S/s/CHAN: (samples per second per channel).
Specifying a Sample Rate for all other instruments
Specify a throughput sample rate:
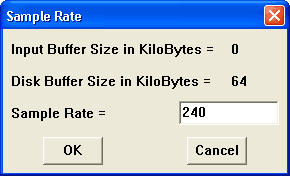
WinDaq Acquisition automatically allocates the correct amount of buffer space when you input a sample rate. The Input Buffer Size and Disk Buffer Size values are displayed for informational purposes only.
Keep in mind that the sample rate is actually a throughput rate. The sample rate per channel (obtained by dividing the selected sample throughput rate by the number of channels enabled) is displayed in the lower left corner of the window as S/s/CHAN: (samples per second per channel).

Although thousands of different sample rates may be configured, some discrete rates are not attainable. This limitation is due to the inability to divide the master clock in a manner that results in an even-numbered quotient. For example, you may see a sample rate of 2999.63 when you entered 3000.