
Configure Channels > For Serial Port Products Activating Procedure
For Serial Port Products
Activating Procedure
- In the Edit
menu click on Channels... or click
on the Enable button in the Toolbox.
The Ch: block cursor will blink in the
on the status bar. The currently active list of enabled channels are displayed
in this field, immediately to the left of the cursor (blinking prompt).
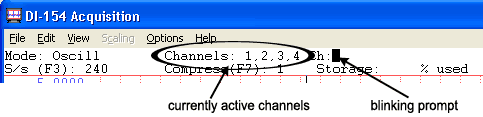
- Enter the desired channel
number and press the ENTER key. Repeat for each desired channel. Each
active channel will have its corresponding channel number displayed in
the currently active channels list.
- When all desired channels
have been enabled, exit the channel configuration routine by pressing
any key other than the “D” or “I” key.
Channels may be disabled by typing the channel
number preceded by a minus (“-”) sign. For example, typing “-3” disables
channel 3 and removes it from the list of currently active channels.
Note:
Channels may not be added after the RECORD
mode has been entered.
If Your Instrument Has More than 16 channels:
This information
varies by instrument. Refer to Channel
Selection for DI-500/510/750/760 Series Instruments for complete details.
Top