
 View Cart
 sales@dataq.com
 330-668-1444
Networked Data Acquisition Using WinDaq Software
Using WinDaq software and the client networking capabilities built into all Windows Operating Systems, you can monitor acquired data remotely in virtual real time via the WinDaq Waveform Browser (free download!). You can monitor a single data acquisition device or several simultaneously from the comfort and safety of your office by simply recording your data onto a shared local drive. This subtle, yet powerful tool is built right into the Microsoft Operating System—no additional software or hardware is required. It's quick, easy to incorporate, and after reading this application note, you'll be an expert!
This application note provides examples demonstrating the usefulness and convenience of this feature and also covers some security issues related to sharing data.
A medical researcher monitoring an ongoing laboratory experiment can record data onto a network drive, allowing remote access and the ability to "keep tabs" on the experiment without being physically present at the lab. Colleagues connected to the network also have access to the data.

Data is acquired and recorded onto a shared local drive at the Data Acquisition Station. Data can then be accessed from any of the Playback Stations using the Waveform Browser.
By recording data to shared local drives an industrial technician can set up several data acquisition stations and monitor each station from a central location. This eliminates the need to physically go from machine to machine checking data. Again, recorded data can be shared with others on the network.
Security Issues
Before sharing data on a network there are security issues that must be taken into consideration. When sharing a local drive you risk the possibility of others on the network gaining access to data that you had not intended to share. To reduce the risk, share only the folder into which you'll store data and NOT the entire drive.
Another security concern is the spread of computer viruses. Once you share your local drive you make it vulnerable to viruses that may be present on the network. Again, to reduce the risk, share only the folder into which data will be stored. Be cautious and, most importantly, keep your anti-virus software up-to-date.
Procedure
Use the following procedure to share data on your network.
- Share a local folder:
- From the data acquisition station, open the "My Computer" window and navigate to the folder into which your data will be stored.
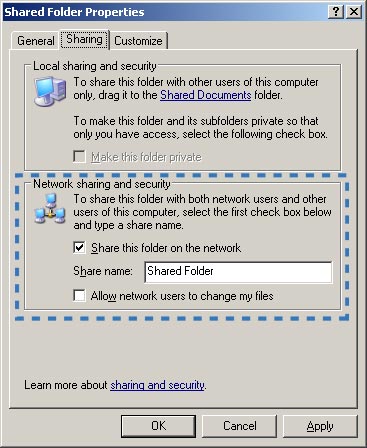
- Right-click on the folder and select "Sharing and Security."
- Select the "Sharing" tab.
- In the box titled "Network Sharing and Security" put a check next to "Share this folder on the network" and click "OK."
- Map the shared local folder.
- From the playback station open the "My Network Places" window and single-click the folder into which data is being stored.
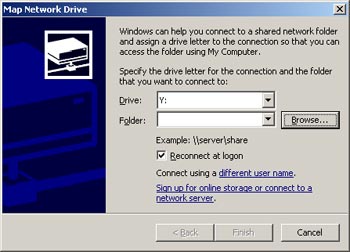
- Click on "Tools" and select "Map Network Drive."
- From the "Map Network Drive" menu choose a drive letter for the connection; you must also select the folder into which data is recorded (use the "Browse" button to locate the folder).
- Click "OK."
- You can now record to the shared drive and view data from any computer with access to the network.
- To view your data in virtual real time from a remote playback station:
- Open the WinDaq Waveform Browser and select the folder you'd like to view from the "WinDaq Playback Open" window.
- In the Waveform Browser click "Search" and select "Autoscroll Right."
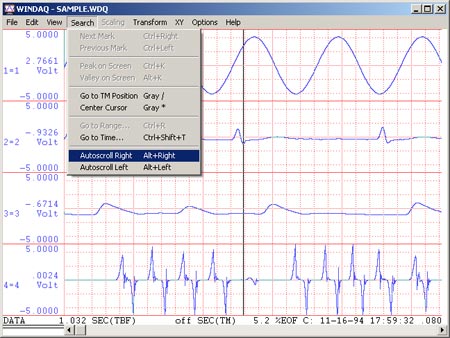
Recorded data will begin to scroll across the Waveform Browser at a rate slightly behind the real-time display.
That's all there is to it!
Conclusion
The ability to remotely view and share recorded data allows for flexibility while saving time and effort. With no additional hardware or software required and a simple procedure to follow, remote viewing and sharing of recorded data has never been cheaper or easier.
Note: This procedure assumes a Windows network using the Windows XP Pro operating system. This procedure will vary depending upon the operating system and network that you are using.