
 View Cart
 sales@dataq.com
 330-668-1444
ActiveX Controls for Data Acquisition Applications
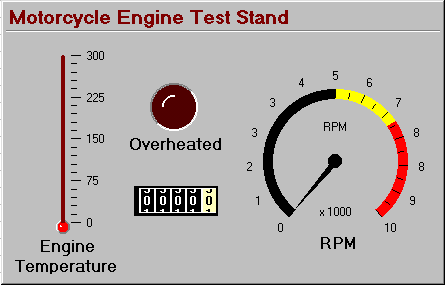
This tutorial will show you how to use the activeX controls named XControls in Excel with WinDaq/XL. WinDaq/XL is DATAQ's software add-on to WinDaq/Lite, /Pro, and /Pro+ that allows data acquired by these packages to be ported to a Microsoft Excel spreadsheet. Let's say you need to measure the power and endurance of a motorcycle engine. You may want to test the engine to see how long it can run at its maximum level without overheating. This would involve a control to measure RPM, a control to measure the temperature, an odometer control, and an LED control that will let you know immediately when the engine has overheated. When you place all of these controls on a panel and label them, it might look something like this:
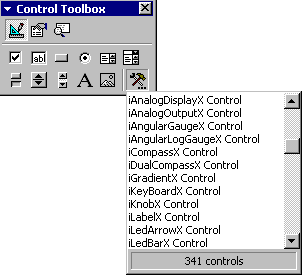
Step One:Go to View > Toolbars > Control Toolbox. This will display the Control Toolbox. Click on the "More Controls" button in the lower right corner to reveal additional controls. |
 |
Step 2:
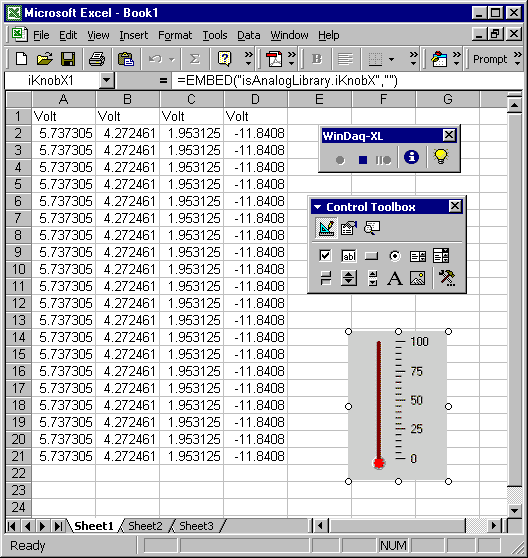
The controls that have an "i" in front of them are the XControls. When you find the one you want, click on it once. Your cursor will become a crosshair. Click and drag to size the control or just click where you want it to be placed on the screen and it will appear at its default size. In the example below, the iThermometer control was placed at its default size.
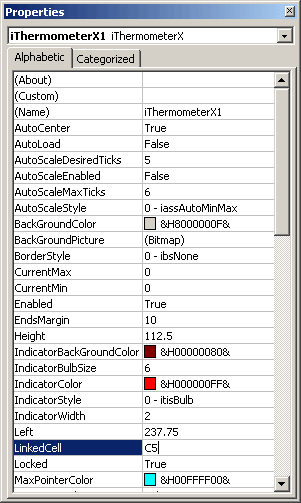
Step 3:When the control is placed, you are automatically in "Design Mode". Right click on the control and select "Properties" or just press the Properties button in the Control Toolbox. Here, you can change many properties of your control, such as size, style, font, etc., but, most importantly, you can link the control to your application. Next to "LinkedCell", type in the Column and Row of the cell to which you would like the control linked. (For example, to specify a cell in Column "C", Row 5, you would just type "C5", as shown at right.) |
 |
You can change other properties by right clicking on the control and selecting "(the name of your control) Control Object" and then click on "Properties". (For our example, you would select "iThermometerX Control Object" > "Properties".) |
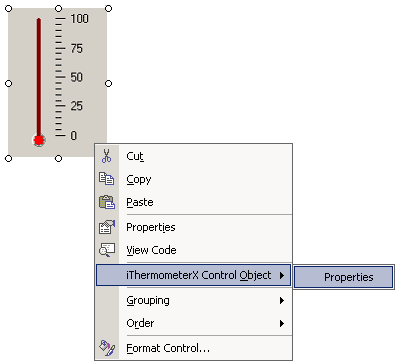 |
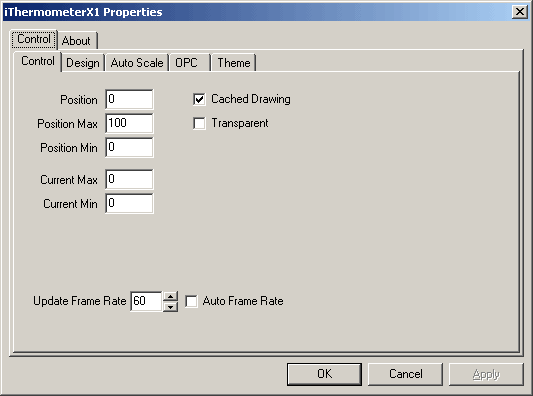
This displays another window specific to the control, as shown below for the "iThermometer" control.
Step 4:
To exit Design Mode and apply any property changes you have made to the control, click the "Exit Design Mode" button on the upper left-hand side of your Control Toolbar. This is also the button you need to press if you want to enter Design Mode at any point to make changes to the control.
Your control is now linked!